Do you too struggle every morning with your eyelash curler and apply multiple coats of mascara? I know this problem. I – to be honest – was sick of it. It took me a lot of time, and the results were negligible anyway. I decided to laminate my eyelashes – Nanolash Lash Lift Kit was supposed to help me with this task. Did it work well?
At-home eyelash lamination – what results did I expect?
My eyelashes are not very problematic by nature. Rather, they are susceptible to styling, although I can’t say that they are long. It also seems like they have lost their flexibility. This is probably due to the excessive use of an eyelash curler.
I’ve been looking for a way to nourish and rebuild them, as well as give them the desired shape. Faced with that, you can probably guess what kind of results I was looking for. I wanted an at-home eyelash lift to:
- regenerate my lashes and moisturize them significantly;
- curl my eyelashes and make them longer:
- made them look visually longer.
Nanolash Lash Lift Kit was supposed to provide me with this. The producer declared that thanks to the content of natural ingredients like Abyssinian oil and vitamins, the lash lift effectively regenerates and also nourishes the eyelashes.
Nanolash Lift Kit was also supposed to ensure results lasting up to 8 weeks. The producer indicated that this applies to eyelashes in fairly good condition. Since mine are exactly that, I should test the kit’s durability as well.

What did I find in the Nanolash lift and lamination kit?
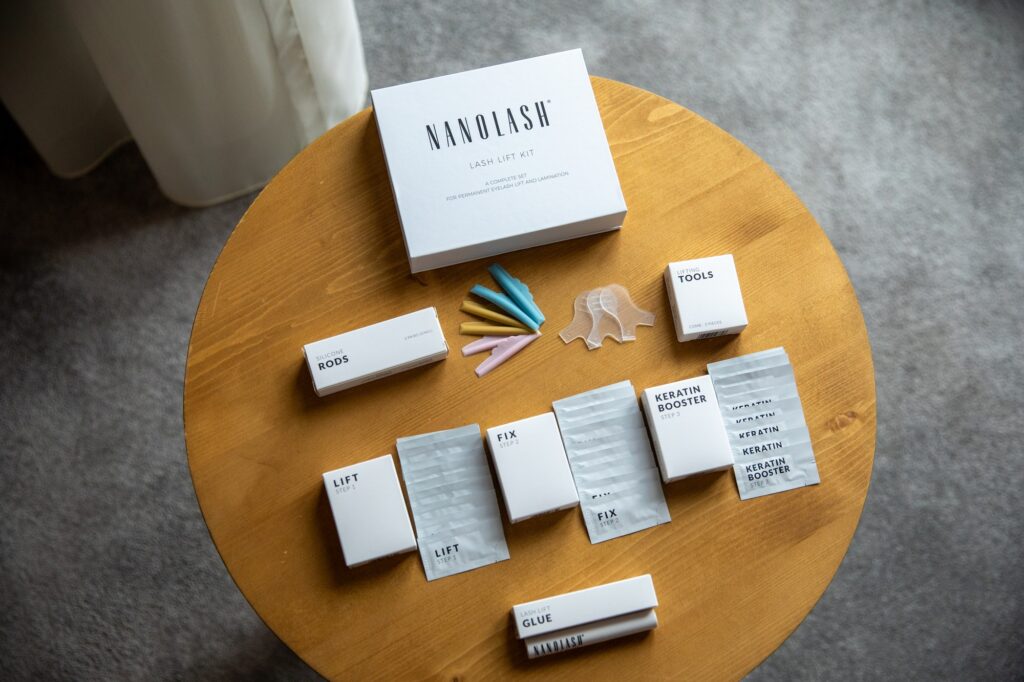
Let me start from the beginning – what the eyelash lamination kit from Nanolash consist of. Well, inside the box I found:
- eyelash-laminating products – 3 types to be applied in the order they are labeled;
- 3 sizes of silicone rods;
- Lash Lift Glue for attaching the rods;
- other accessories necessary for at-home eyelash lamination.
I will point out that the lamination products come as sachets of 0.5 milliliters each. There are 30 sachets in total in the kit. This means that with its help, you can perform as many as 10 lash lifts without leaving home.
How did I laminate my eyelashes at home with the Nanolash Lift Kit?
There’s no denying that I approached at-home eyelash lamination with quite a bit of apprehension. I had never done it before. However, the producer declared that the lash lift kit from Nanolash is also designed for complete beginners. Well, I got to work.
I started by thoroughly cleaning my lashes. I didn’t leave any product residue on them, which would make it difficult for the nourishing ingredients to penetrate them. Next:
- I separated the top and bottom lashes with special eye pads;
- I attached the silicone rods with Lash Lift Glue;
- I started applying the first product, combing the lashes upward;
- I left it on for 10 minutes and washed it off;
- I repeated the same with the other two formulas.
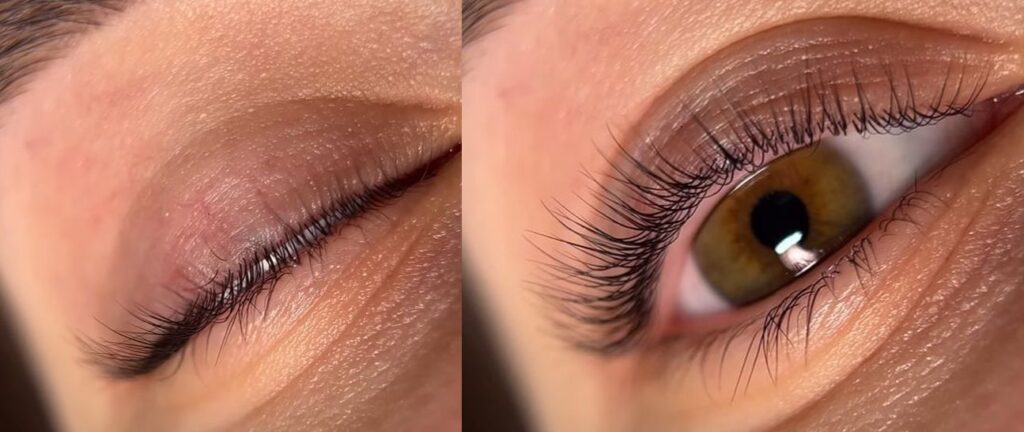
At the very end, I gently peeled off the rods and examined my lashes. They looked exceptionally long, beautifully defined, and curled. In addition, they became soft and flexible. I parted with my eyelash curler for good.

A few words about the durability of the effect. In my case, it lasted even longer than the declared time by the producer. However, I took care of my lashes and did not overload them with excessive styling. It seems to me that this could have significantly prolonged the durability of my eyelash lamination at home.
Eyelash lamination with Nanolash Lift Kit – summary
Nanolash Lash Lift Kit met my expectations. I can confidently say that I managed to achieve the expected results. What’s more, I also confirm that an at-home lash lift with this kit is easy, and the results are durable. I have no doubts about this.
If you want, you can also laminate your lashes at home by yourself. Order Nanolash Lash Lift Kit from the producer’s website and see for yourself. I guarantee you won’t regret it!
